Budget Voice Acting Studio Setup for Beginners
A beginner voice acting setup can get expensive fast if you buy what looks impressive instead of what actually improves your recordings. The truth is simpler: a quiet space, decent acoustic treatment, a clean signal, and consistent performance matter more than a premium microphone on day one.
You do not need a fancy booth to start auditioning or practicing. You need a space that keeps your voice natural and keeps the room out of the recording. For many people, that space is already at home.
A full coat closet can be a great first studio. Clothing absorbs reflections, the small space limits echo, and you can start testing right away without spending a fortune.

Start with the room before you buy more gear
The room is usually the weakest link in a beginner setup. A great microphone will not fix a boxy bathroom sound, computer fan noise, air conditioner rumble, or bare-wall reflections. In fact, a sensitive mic can make those problems more obvious.
Before buying anything else, find the quietest space you can control.
Good beginner options include:
A coat closet full of clothing
A walk-in closet with hanging fabric
A small bedroom with rugs, curtains, and soft furniture
A corner treated with thick blankets behind and beside the mic
A portable vocal shield paired with real room treatment
The coat closet wins for many beginners because it already has soft material on several sides. Coats, shirts, dresses, and fabric boxes absorb the high and mid reflections that make recordings sound hollow.
A closet is not perfect. It can sound too tight or muffled if you bury the mic in fabric. It can also get warm and uncomfortable. Still, it is one of the cheapest ways to start learning what a clean recording sounds like.
When setting it up, avoid pressing your face directly into the clothes. Leave a little breathing room around the microphone. Stand or sit so the mic is surrounded by soft surfaces, but not completely smothered.
A simple starting setup looks like this:
Clothes behind the microphone
Clothes or blankets to the left and right
A rug or carpet underfoot
No noisy electronics inside the closet
A small light that does not buzz
A script holder that does not rustle
If you can hear the room in your headphones, the mic can hear it too. Clap once in the space. If you hear a sharp slap or ring, add more soft material. If your voice sounds dull and lifeless, pull the mic slightly away from the heaviest clothing.
Buy a solid beginner microphone, not a dream microphone
The Sennheiser MKH 416 is a favorite in many voiceover circles for a reason. It has a focused sound, strong presence, and a polished quality that works well for commercial reads, promos, trailers, and narration. It is also far more expensive than most beginners need.
A mic like the Audio-Technica AT2020 Cardioid Condenser Studio Microphone can absolutely get the job done when paired with a quiet space and good recording habits. It will not magically make a bad room sound good, but neither will a premium mic.
The AT2020 is a common entry-level condenser microphone. It has a cardioid pickup pattern, which means it mainly captures sound from the front and rejects some sound from the back. That helps in a closet or treated corner, as long as you aim it correctly.
Place the front of the mic toward your mouth and angle the back toward the noisier part of the room when possible. If your computer is behind the mic, that can help reduce fan noise. If your computer is in front of the mic, the mic may capture more of it.
A beginner mic setup should include:
The microphone
An audio interface with phantom power for condenser mics
An XLR cable
A sturdy mic stand
A pop filter or foam windscreen
Closed-back headphones
Recording software, also called a DAW
You can record voice acting with free or low-cost software (I.E. Audacity). The expensive part should not be the software at first. Learn how to record cleanly, save files properly, edit breaths (not all of them so you sound human), and export in the requested format.
Do not buy a premium mic because you feel behind. Buy it when your space, performance, editing, technique, and earnings are available/good enough to reveal the difference.

Set your levels without cheating the noise floor
Good recording levels are boring, and that is exactly the point. They give you clean audio without clipping, hiss, or heavy processing.
A common beginner mistake is turning the mic gain way down to make the room look quieter on the meter. That does not fix the noise. It only lowers everything, including your voice. Later, when you normalize or boost the recording, the noise comes back up with it.
Do not “cheat” by decreasing the mic level just to make the waveform look clean. You need to record your full voice at a healthy level.
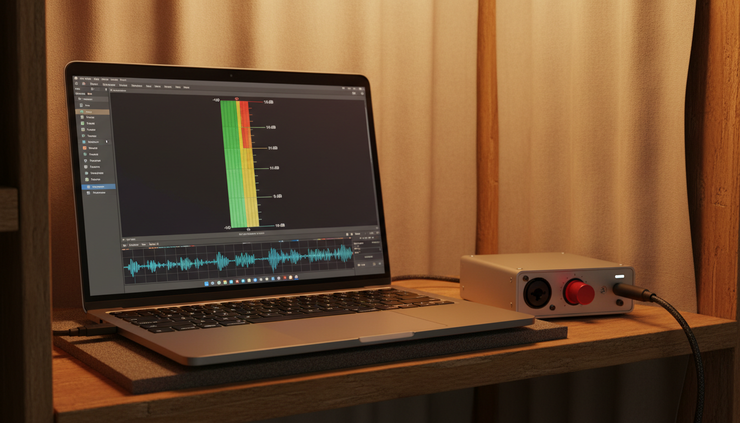
A practical goal is to speak with your normal performance energy and have your voice land around -10 dBFS on your DAW meter during stronger moments. You do not want to slam into 0 dBFS. Digital clipping sounds harsh and cannot be repaired cleanly. At the same time, you do not want the recording so low that you need a massive gain boost later.
For spoken voice, many editors aim to deliver finished audio around a comfortable listening level, often near -20 dB RMS depending on the platform, client, or project specs. The exact delivery target can change, but the recording principle stays the same: capture a strong, clean signal first.
Noise floor matters too. When people talk about getting close to a natural RMS of -65 dB or even -75 dB, they are usually talking about the room tone or noise floor when no one is speaking. Lower is better because it means the recording space is quieter.
A simple test can tell you a lot:
Set up your mic the way you plan to record.
Set your gain while speaking in your real performance voice.
Record 10 seconds of silence.
Record 20 seconds of your normal read.
Listen back with headphones.
Check the meter for voice level and background noise.
You want the silent section to be naturally quiet, not fake-quiet because the input gain is too low. If the silent section sits around -65 dB RMS or lower, that is a good sign for a beginner home setup. If it is closer to -45 dB or -50 dB, listen for what is causing it.
Common noise sources include:
Computer fans
HVAC systems
Refrigerators
Street traffic
Fluorescent lights
Laptop chargers
Chair squeaks
Clothing movement
Mouth noise from dehydration or tension
Turn things off one at a time and test again. Move the microphone farther from the computer. Record at quieter times of day. Put the laptop outside the closet if possible, then run a longer cable or control it remotely.
The goal is not a perfect lab. The goal is a recording that can be cleaned lightly without sounding processed.
Build the setup in the right order
A smart budget setup grows in stages. Spend money where it solves a real problem, not where it looks exciting.
Here is a sensible order for a beginner voice acting studio.
Priority | What to focus on | Why it matters |
1 | Quiet recording space | Room noise ruins takes faster than cheap gear |
2 | Basic acoustic treatment | Soft surfaces reduce echo and harsh reflections |
3 | Decent microphone | A solid mic captures a usable voice signal |
4 | Audio interface | Clean gain helps avoid hiss and weak recordings |
5 | Headphones | Closed-back headphones help catch problems early |
6 | Workflow | Consistent files, levels, and edits matter to clients |
If money is tight, start with the room. A closet and a borrowed or affordable mic can teach you more than a high-end mic in a bad room.
Once the space works, upgrade the weakest piece. If the mic is noisy or thin, improve the mic. If the interface adds hiss, upgrade the interface. If the room still rings, add treatment. If your editing is slow, learn your DAW before buying plug-ins.
This approach keeps the budget voice acting studio setup for beginners realistic. You are not trying to build a commercial facility on day one. You are trying to capture auditions and practice reads that sound clean, clear, and honest.
Record with your full voice
Voice acting is performance. Gear should support that, not make you shrink.
Many beginners record too softly because they are afraid of clipping or being heard by other people at home. The result is a small, cautious read with a weak signal. Then they normalize it hard, compress it heavily, and wonder why it sounds noisy or unnatural.
Use your full voice. That does not mean yelling. It means recording at the energy the script needs.
For a conversational commercial read, speak like you are talking to one person a few feet away. For narration, keep the tone steady and supported. For character work, give yourself enough distance from the mic so louder moments do not clip.
Mic distance matters. A good starting point is about 6 to 8 inches from the mic, with a pop filter between you and the capsule. Move slightly off-axis if plosives hit too hard. That means speaking a little across the mic instead of straight into it.
Use these checks before recording a real take:
Say the loudest line first and watch the meter.
Make sure strong words peak around -10 dBFS.
Confirm nothing clips at 0 dBFS.
Record a few seconds of silence for room tone.
Listen for mouth clicks, rumble, or clothing noise.
Keep your body still enough to avoid bumps and rustles.
If your recording peaks too hot, lower the gain a little and test again. If your voice is far too low, raise the gain or move a bit closer. Do not set levels based on whispering, then perform loudly. Do not set levels based on shouting, then deliver a quiet read. Test for the actual script.
Keep the signal chain simple
Beginners often add too many effects. Noise reduction, compression, EQ, gates, limiters, and normalization can help, but they can also damage a recording fast.
Start clean. Record dry. Save an untouched version of every take.
A simple beginner workflow might look like this:
Record the raw take (unedited).
Remove obvious mistakes.
Trim the start and end.
Lower or cut loud breaths only when needed.
Apply light noise reduction if the room tone needs it.
Normalize or adjust gain to the requested level.
Export in the format required.
Avoid heavy noise gates at first. They can chop off soft words and make the room tone pump in and out. Avoid extreme EQ unless you know what problem you are fixing. If the voice sounds muddy, mic placement and room treatment may help more than a plug-in.
The cleanest audio usually comes from fixing the source.
That means:
Quieter room
Better mic position
Better gain staging
Less movement
More consistent delivery
Fewer effects
A plain, clean recording beats a heavily processed one that sounds artificial.

Practice before upgrading
A better microphone will reveal more detail, including mistakes. If your room is noisy, it captures more noise. If your mouth clicks are loud, it captures them clearly. If your performance is flat, it will not add emotion for you.
Before upgrading from an AT2020 or similar mic, practice the skills that make the biggest difference:
Reading naturally without sounding like you are reading
Controlling breath without sounding tense
Staying on mic while turning pages or moving
Matching energy across multiple takes
Editing cleanly without over-processing
Understanding client specs
Recording repeatable levels every session
Make short test recordings and compare them weekly. Use the same script so the differences are clear. Change only one thing at a time, such as mic distance, closet position, gain level, or blanket placement.
Listen on headphones, then listen on small speakers. Take notes. If you cannot hear what changed, do not buy gear to fix it yet.
The best upgrade is often knowledge. Once you know your room, your mic, and your voice, every future purchase gets easier.
A simple starter setup that makes sense
Here is a practical setup for getting started without overspending:
A full coat closet or treated corner
Audio-Technica AT2020 or similar cardioid condenser mic
Entry-level audio interface with phantom power
XLR cable
Pop filter
Closed-back headphones
Mic stand
Free or low-cost DAW
Thick rug or blanket for extra absorption
Script stand or tablet placed quietly
That setup can carry you through practice, auditions, demos for training purposes, and early work where clean home audio is acceptable. As you grow, you can improve the booth, microphone, interface, and editing chain.
The key is to build from the recording outward. Good space, good levels, good performance, then better gear.

The smart way to start
Do not spend a fortune on what you think you need to start voice acting. Start with the basics and learn how clean audio behaves.
A full coat closet can be enough to begin. An AT2020 can get the job done. A Sennheiser MKH 416 is a great mic, but it is not the price of admission.
Aim for a quiet natural noise floor, ideally around -65 dB RMS or lower if your space allows it. Record your real performance voice with healthy levels, with stronger moments around -10 dBFS in your DAW. Do not fake a better noise floor by turning the mic down and fixing everything later with huge normalization.
A beginner studio should help you practice more, audition more, and improve faster. Build the simple version first. Then upgrade only when you know exactly what is holding you back.


Comments